
Mug Stencil DIY Project
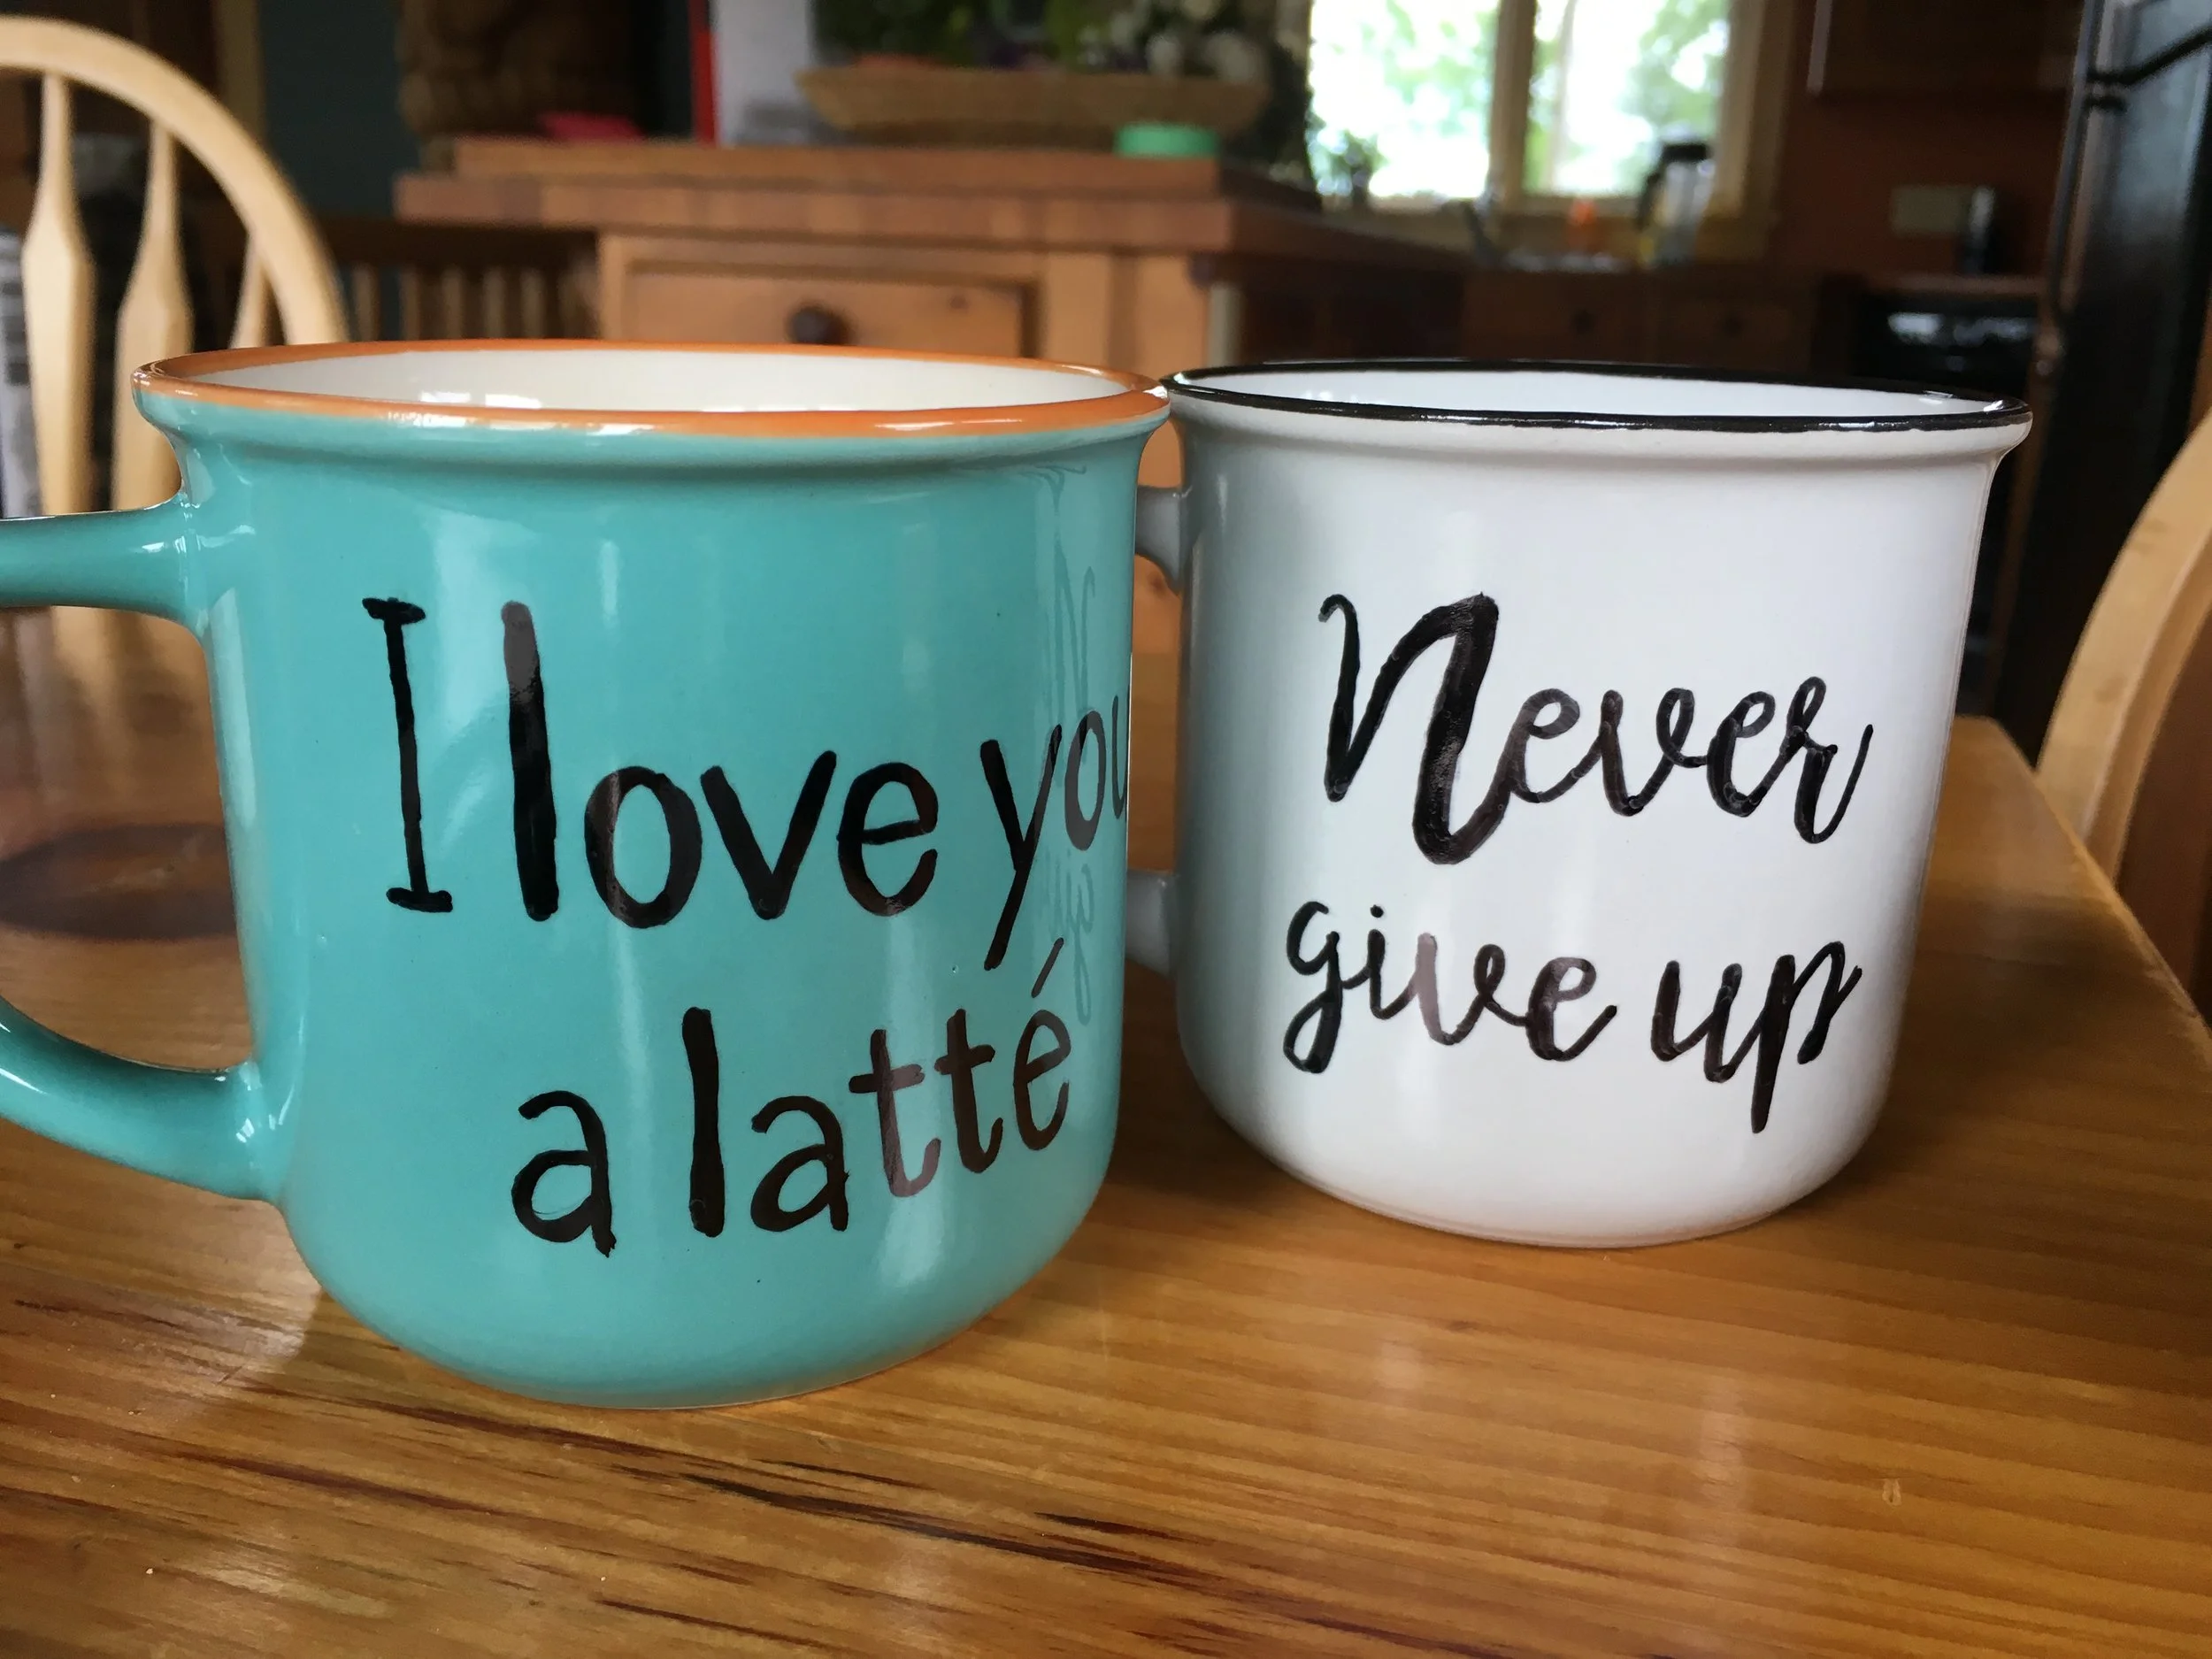
This week I have used the letter stencil maker to customize a coffee cup. This easy DIY requires few supplies and is a fun way to add some inspiration to your morning routine.
This DIY uses a simple pencil transfer method that comes in handy when stencilling on ceramics.
What you'll need:
- a mug
- a pencil
- a permanent marker
- a stencil
- tape
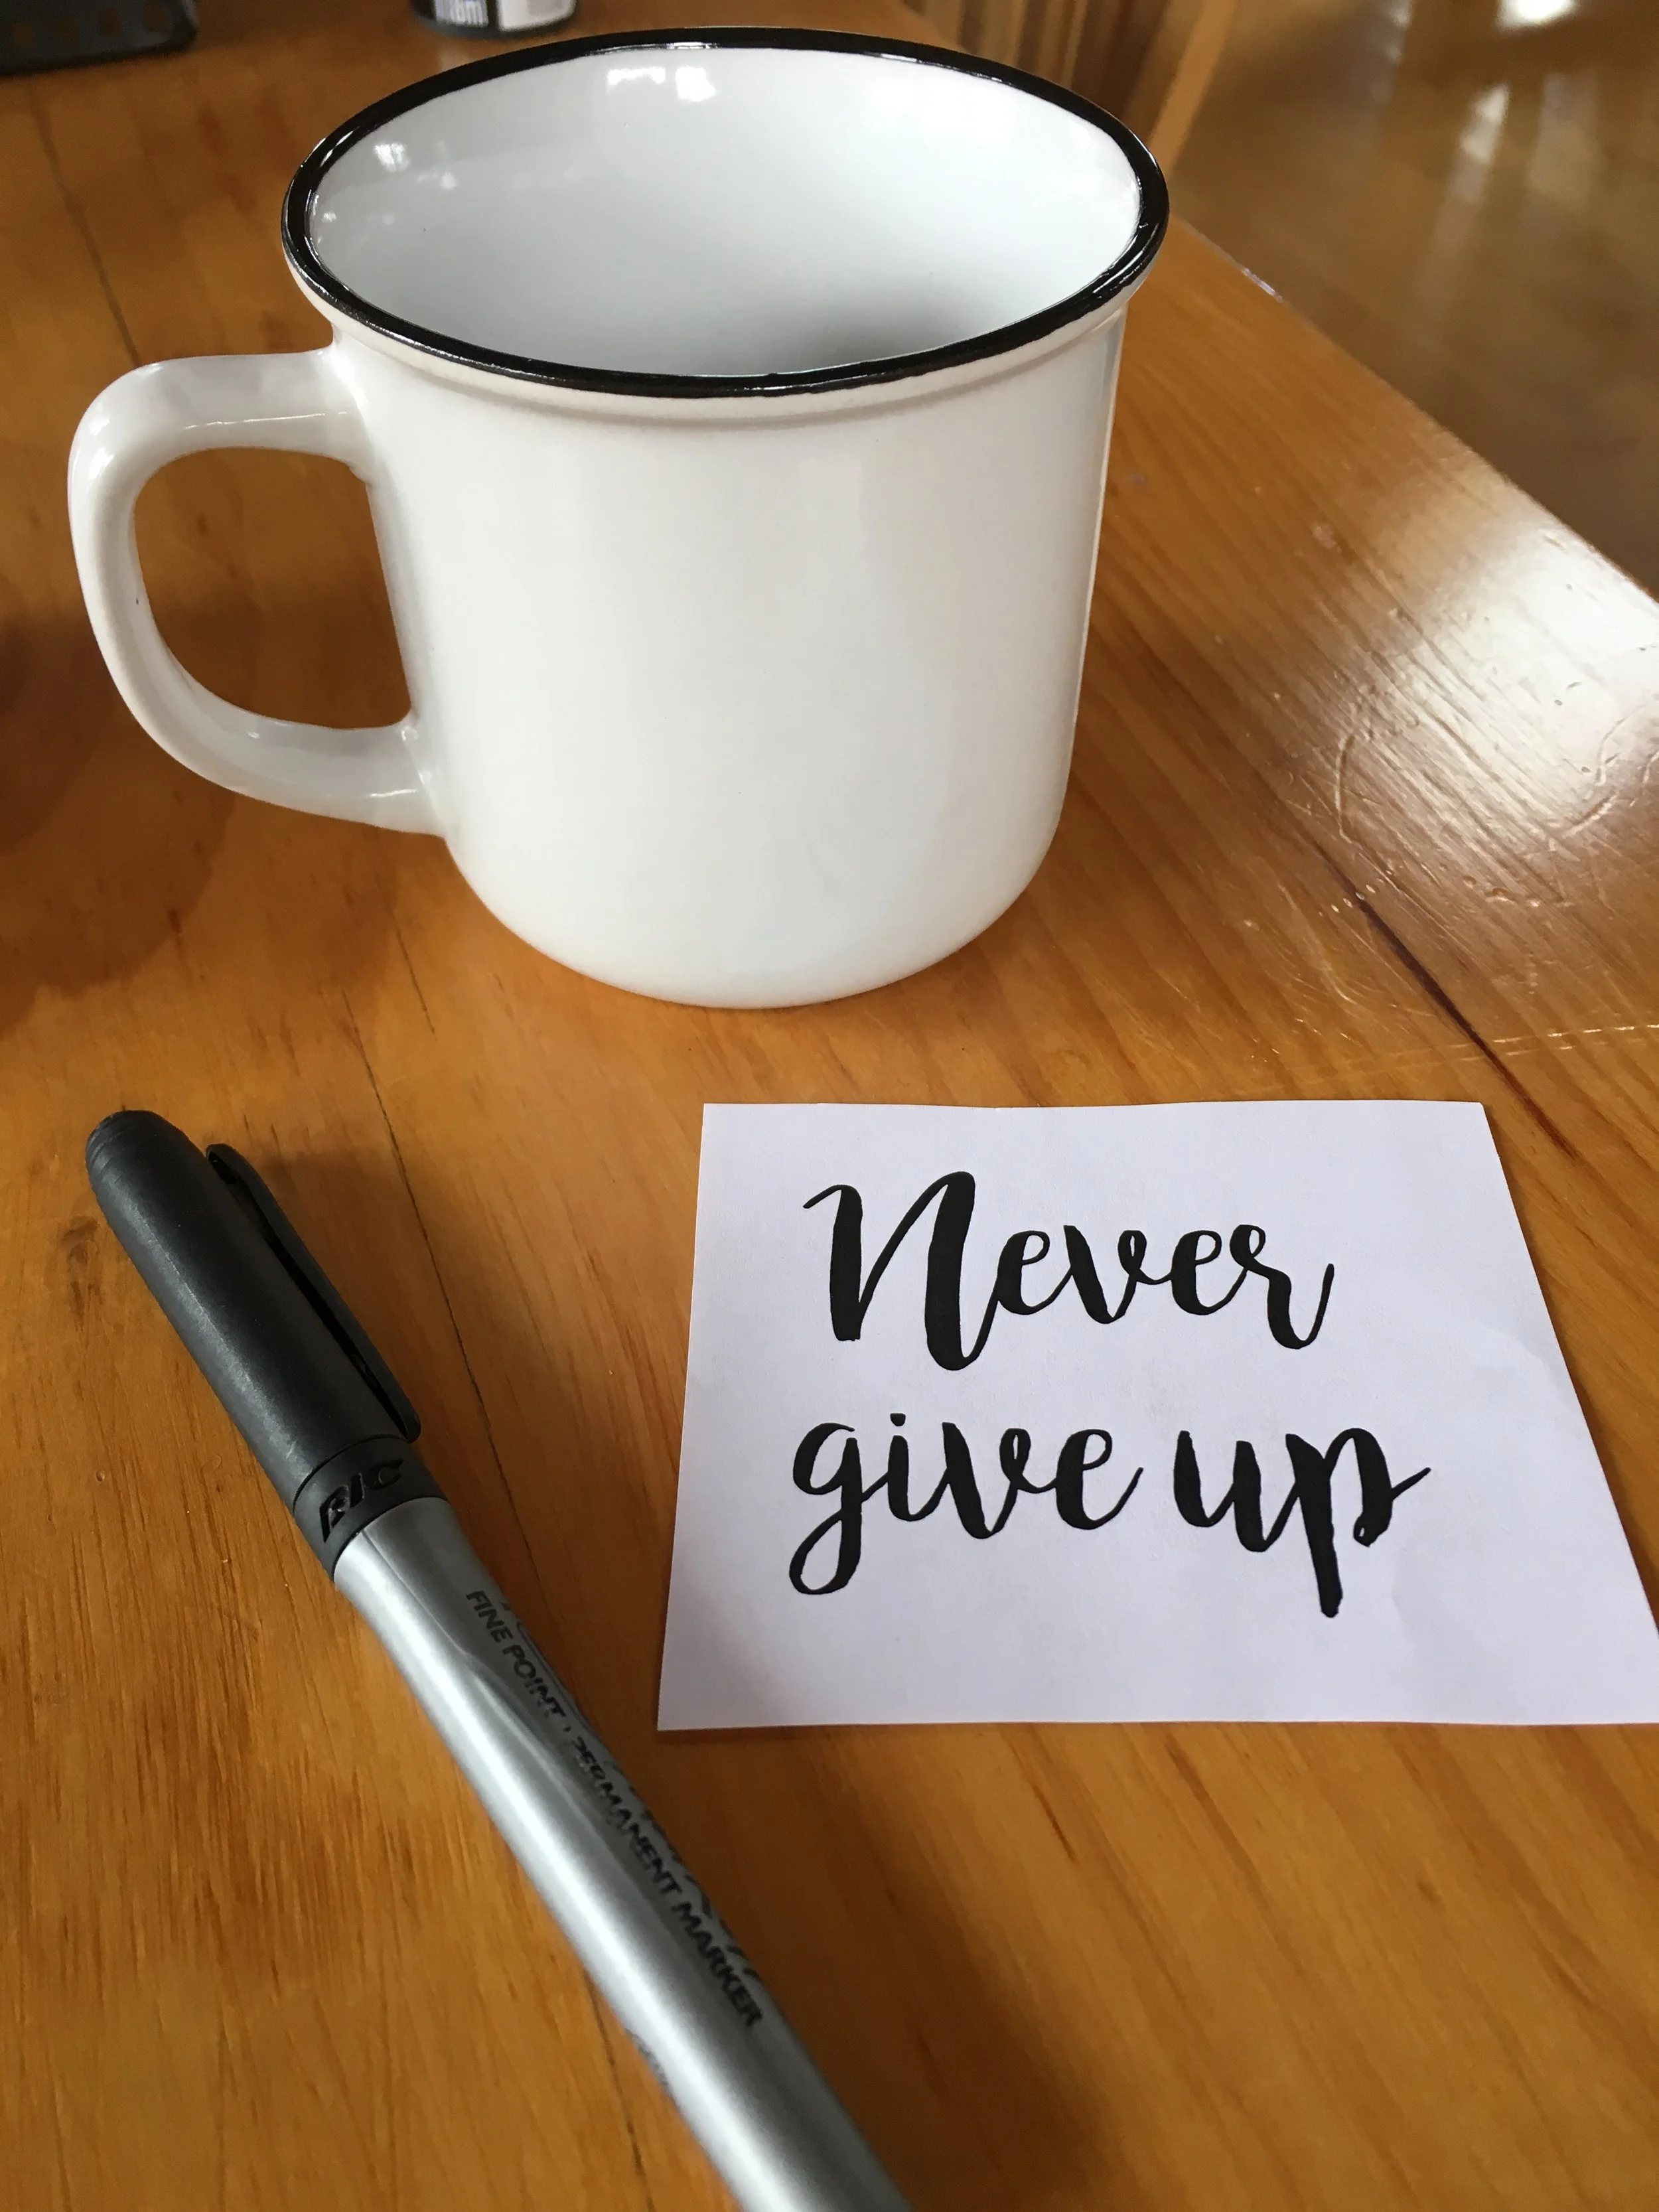
Step 1: start by designing your stencil with the free letter stencil maker.

Step 2: Print your stencil. Use your pencil the thoroughly shade the back of your stencil. Tape your stencil to your mug.
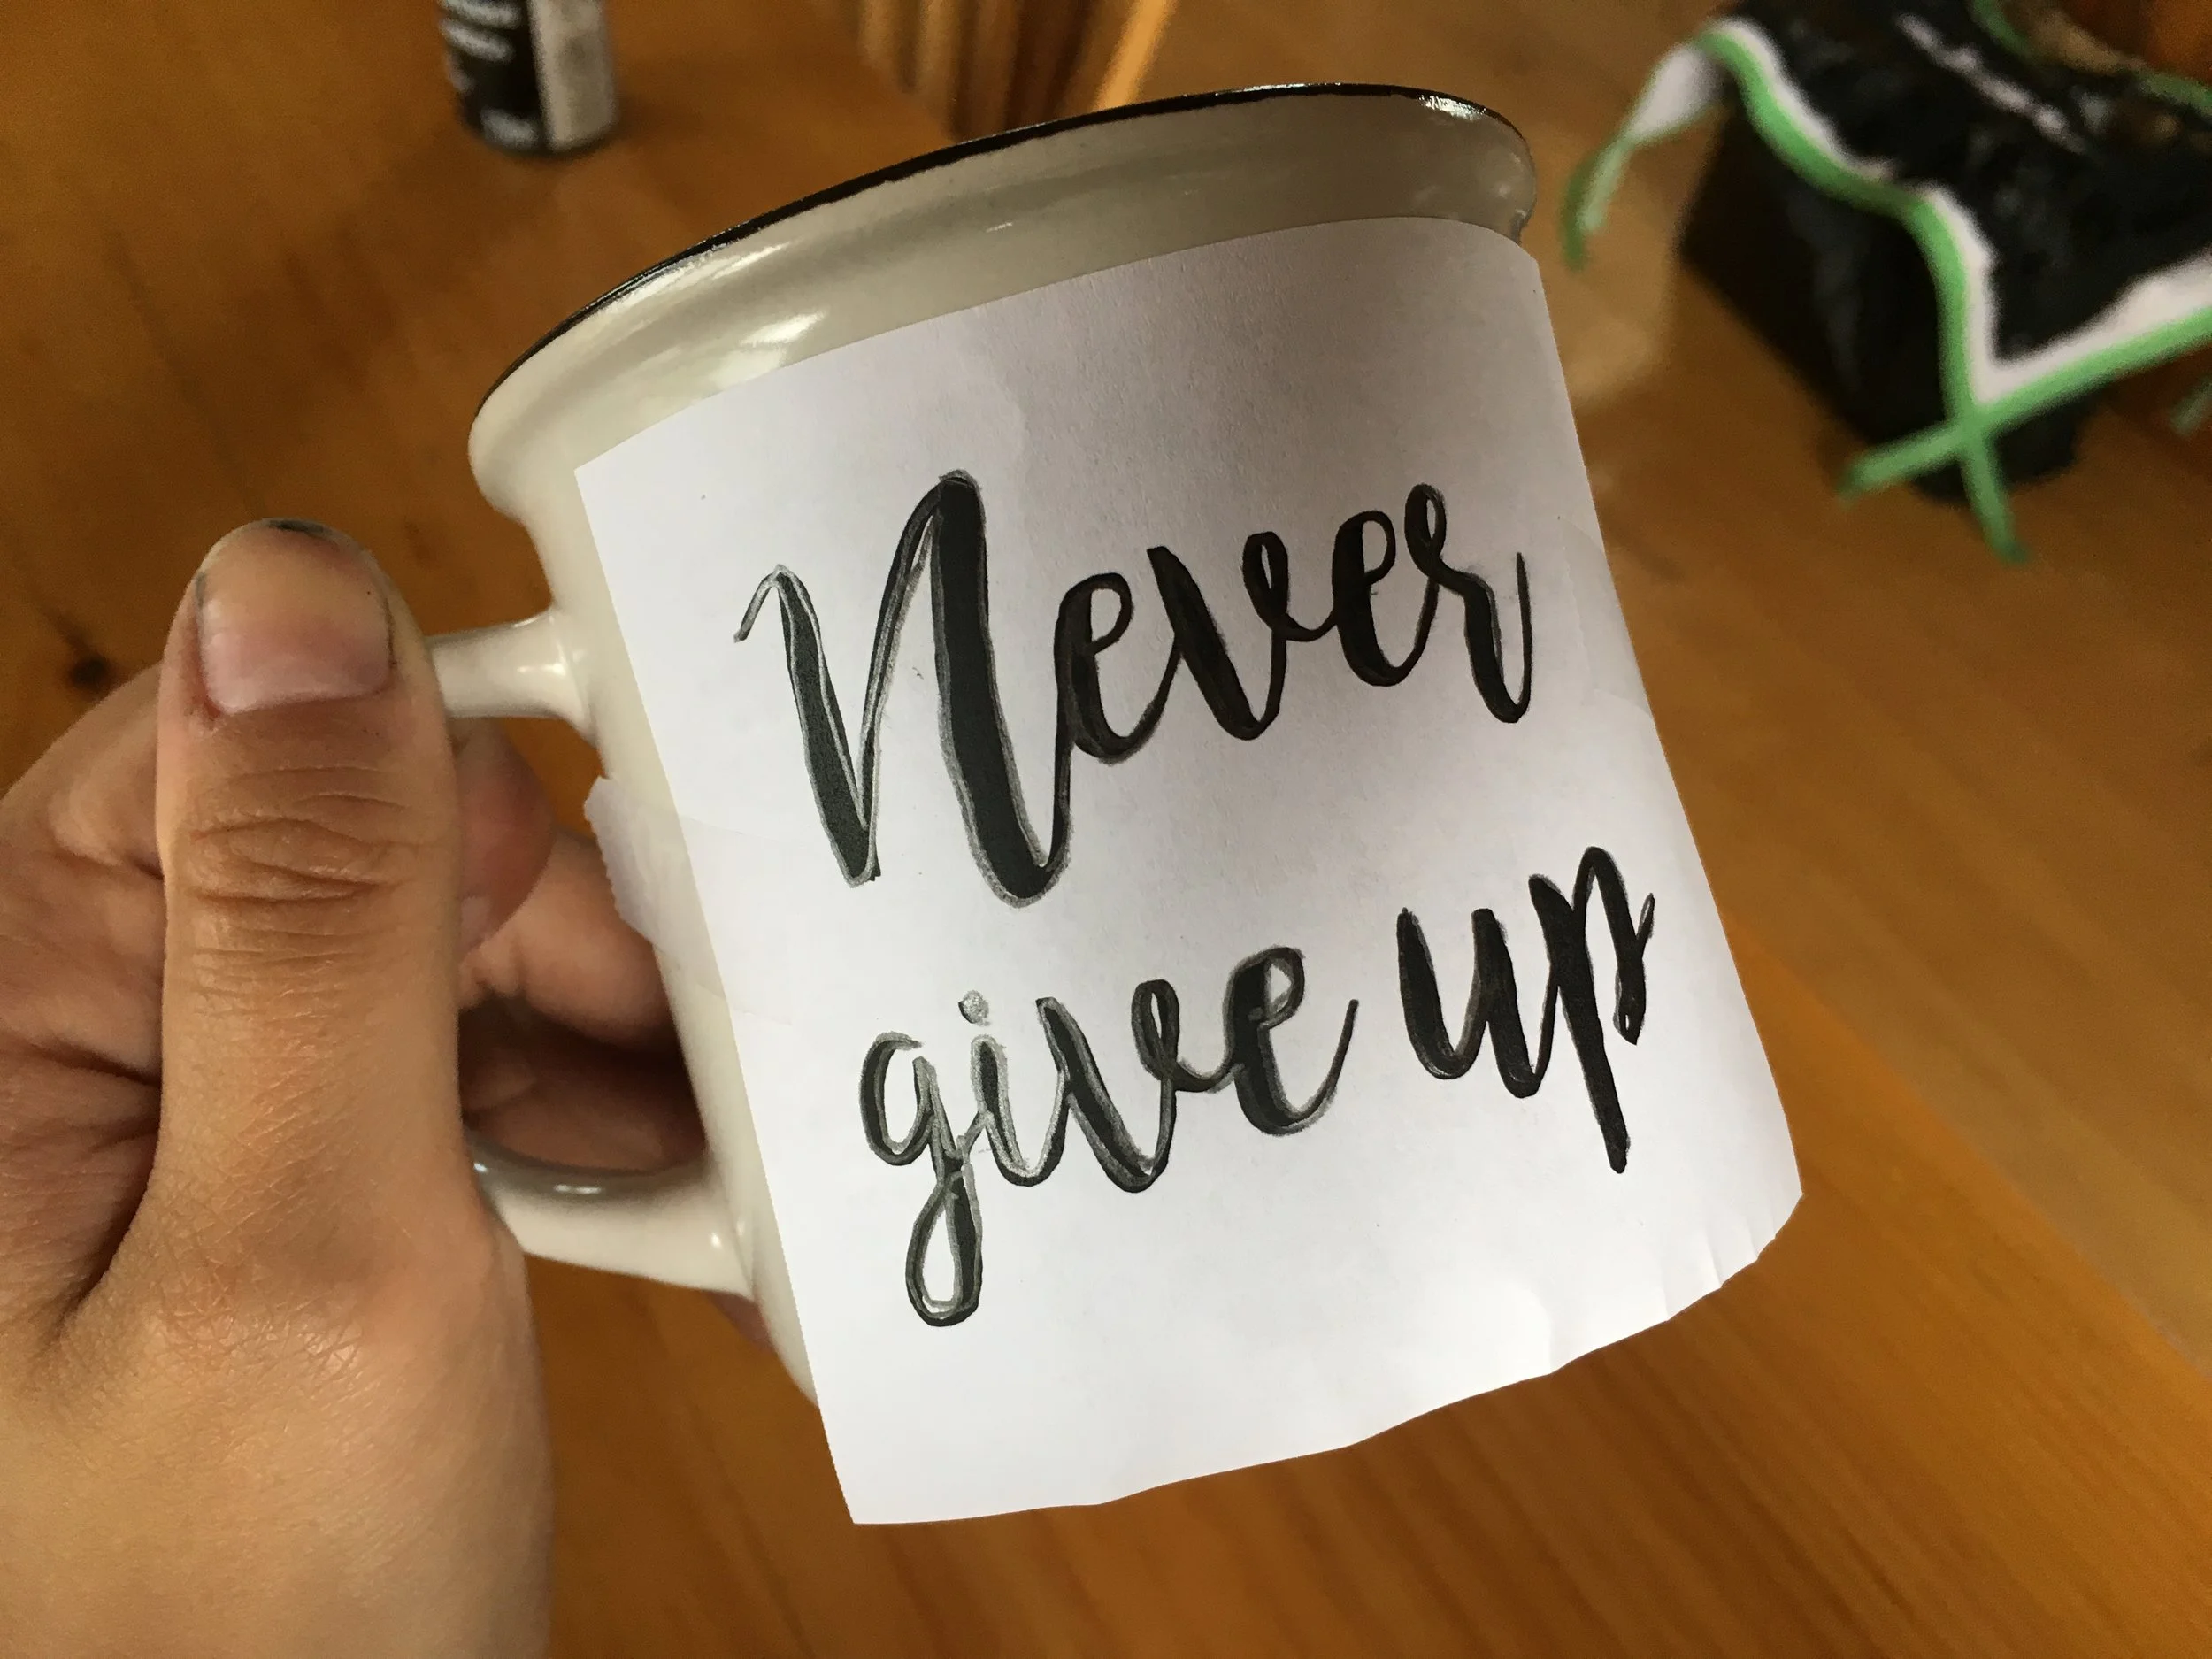
Step 3: Pressing firmly, trace over your design with your pencil so that the graphite on the back side of the paper transfers on to the mug. Go over the design a couple times to make sure the design has fully transferred.
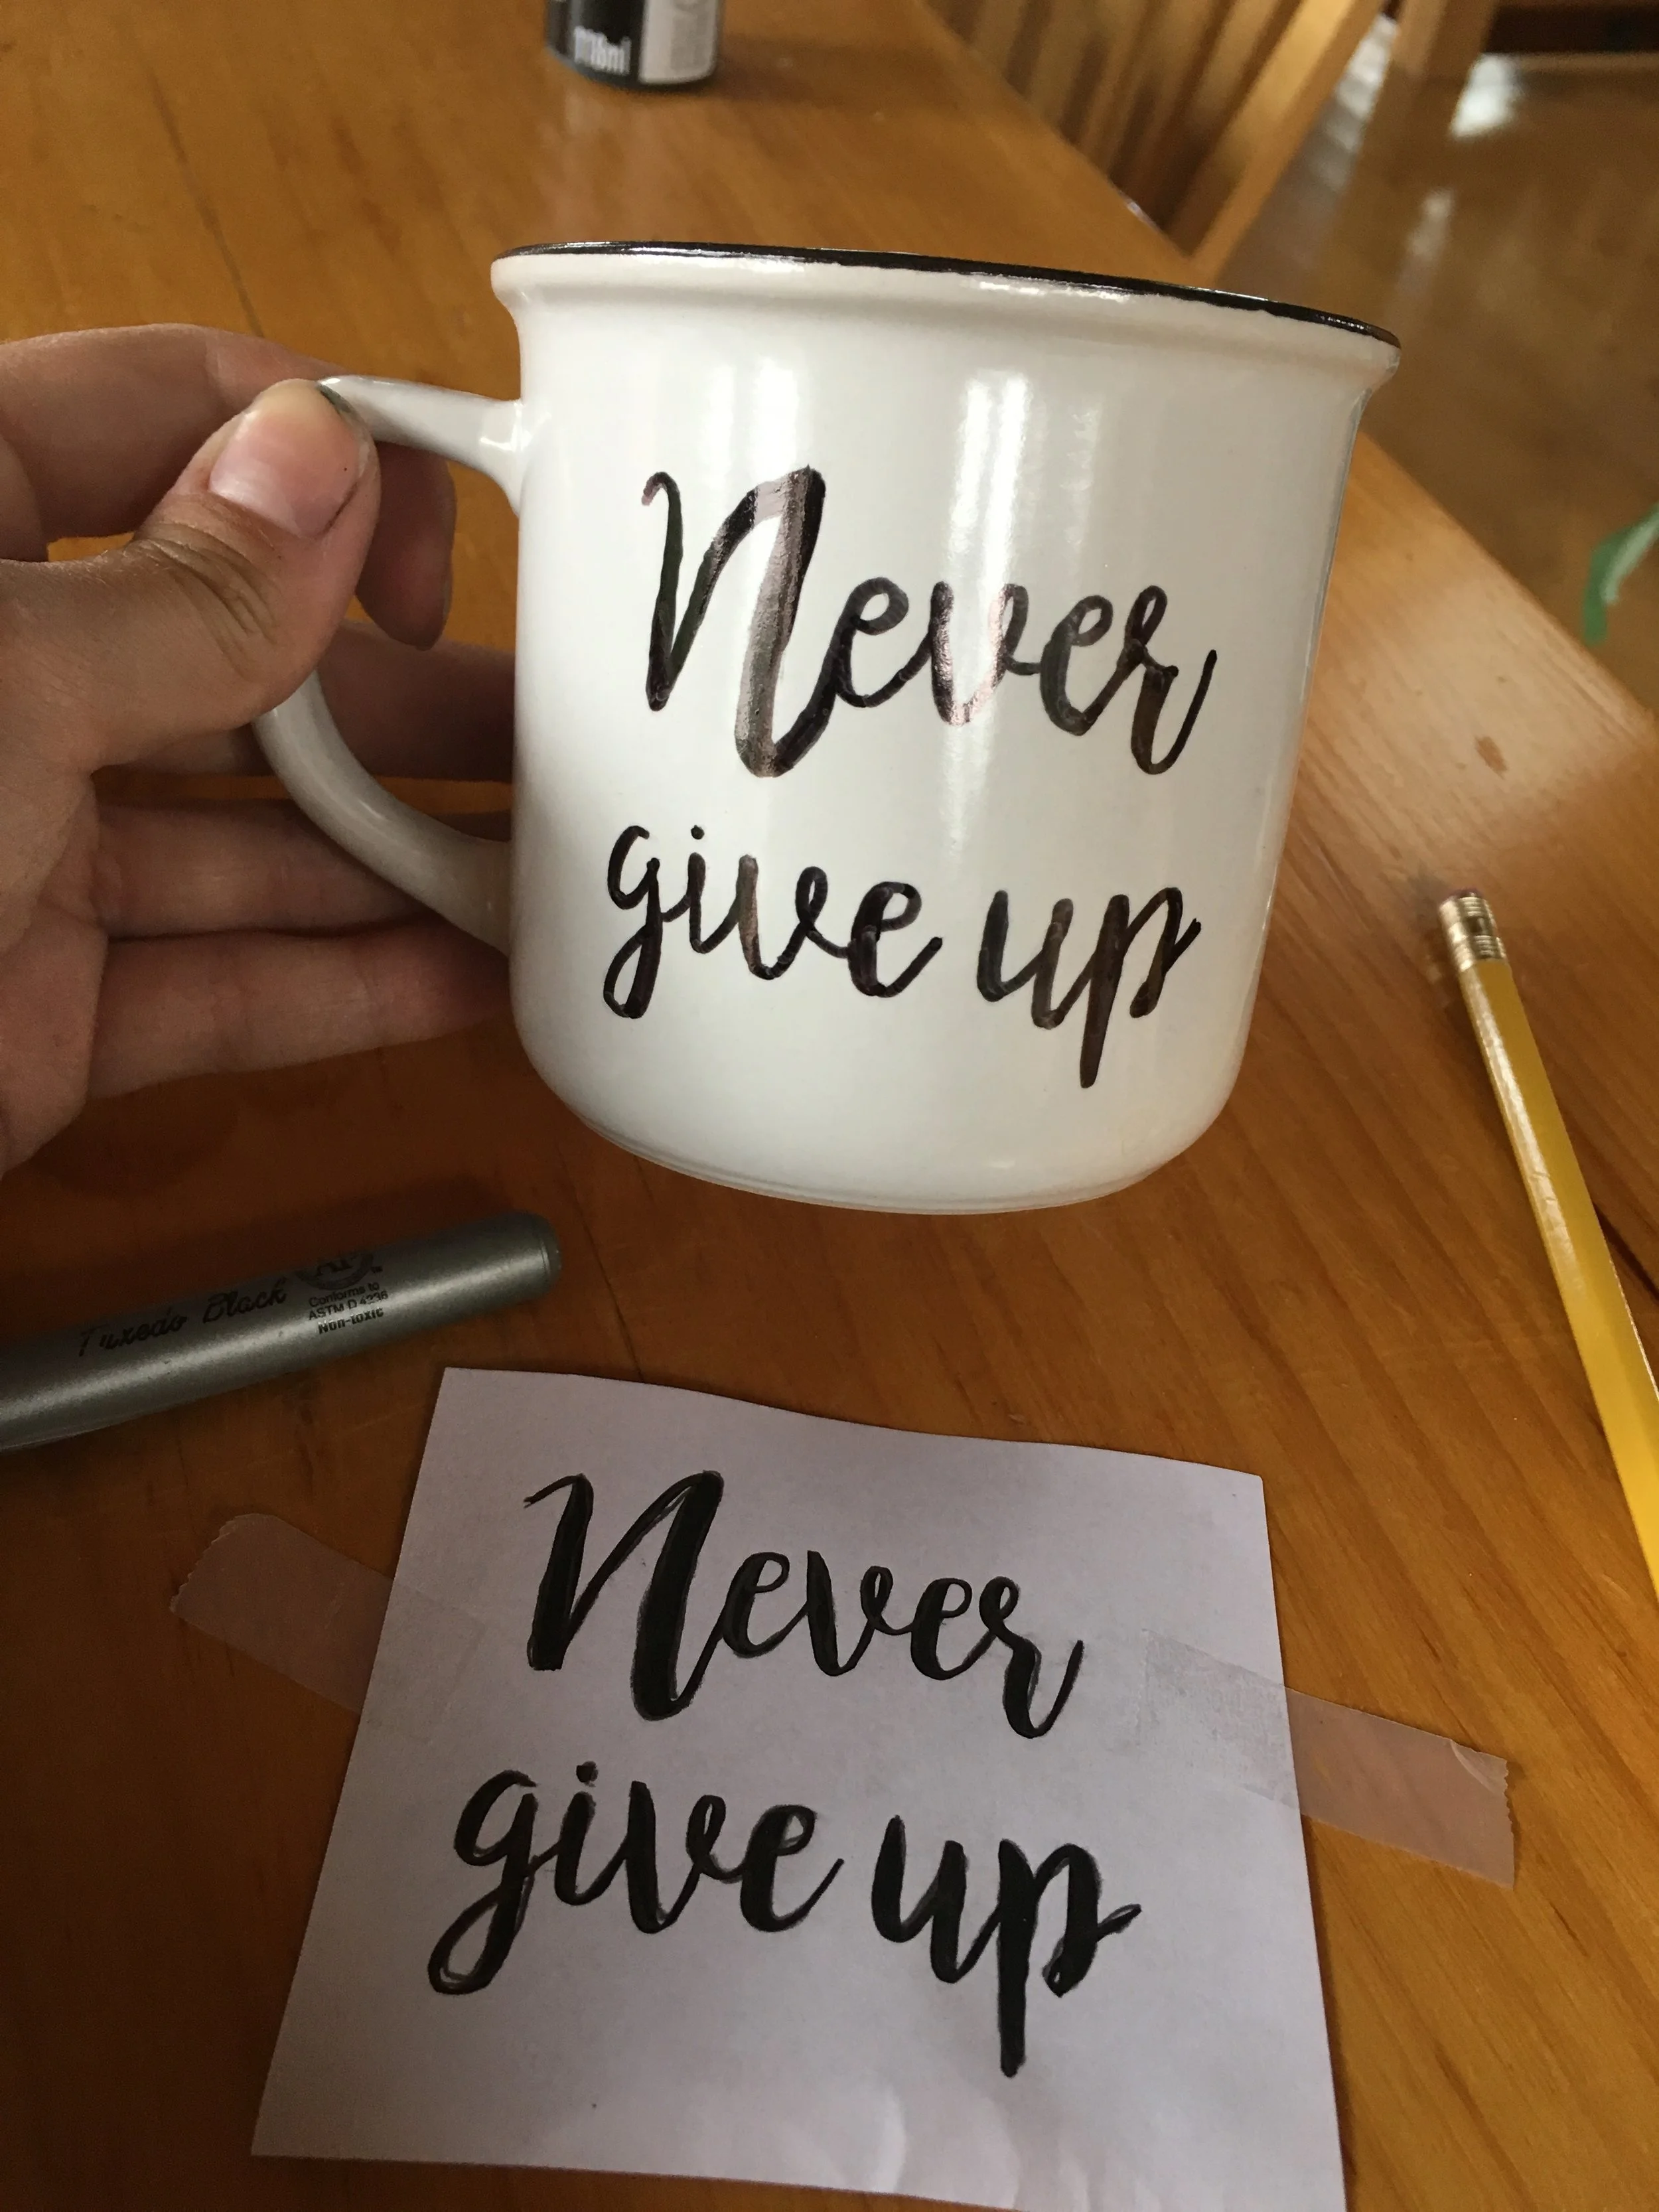
Step 4: Remove your stencil. Trace over the penciled design with a permanent marker. Bake in the oven at 250 for 15 minutes to make the permanent marker set on to the ceramic. Be sure to carefully hand wash your mug and avoid using a dishwasher.
Enjoy!